Using your ground tackle – Anchoring for Beginners (Part 3 of 4)
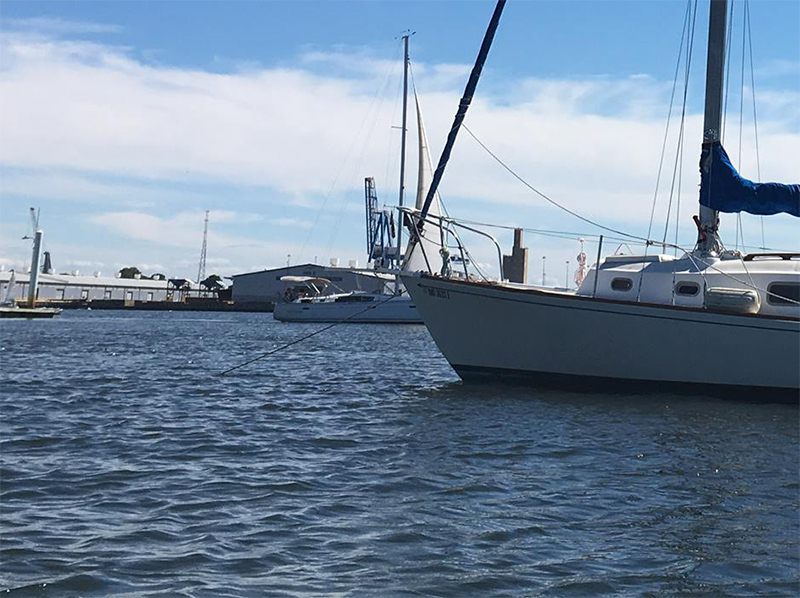
I was at Man-o-War Cay in the Abacos (Bahamas) and I’d just found the single spot within a sea of mooring balls where there was just enough space for me to anchor my smallish cruising sailboat. It was supposed to blow up to thirty knots the next day. Forecasts in the US east coast and the Caribbean could be off by up to ten knots, so I had to be prepared for up to forty knots of wind. Moreover, the wind was going to shift 180 degrees, blowing from the north west instead of south west. This normally wouldn’t be a problem, but the bottom was dense grass growing in sand. Anchors have trouble penetrating grassy sea beds and often become fouled. What to do?
Being secured to the sea bed properly is a critical for safety. Land is the enemy. Solid ground, whether that be sand, rocks, or mud, is what truly destroys boats. A well designed and set up vessel is safest at sea, even during a terrifying storm. But not all boats are built to survive such storms. In that case, the next best thing is a boat at a protected anchorage. To do that, you need a boat with good ground tackle and accompanying hardware. Its a lot easier to add ground tackle to a boat, than to get a new one that can survive storms.
Having good ground tackle is only half of the equation. You must know how to use it. Anchoring is an art, and a ticket to freedom. Once you understand it, you will not be afraid to cruise into off-the-beaten-path places. Dock and mooring ball fees will no longer be a concern, and you will no longer have to plan your cruise around these things. Less visited reef dive spots, fishing grounds, towns and nature will all be at your fingertips. Cruising ‘on the hook’ is an amazing thing indeed.
You can read volumes of books about anchoring, and you should. You could put out two anchors to reduce your swing when tides and winds shift. You could anchor to face the swells and not the wind, when the two are not coming from the same direction. You can even anchor other people’s boats when they are unattended and dragging. But since this is a quick-and-dirty guide to adding heaps of seaworthiness to your boat, we will focus on two things – how to properly set your anchor, and how to anchor in the face of a bad storm.
Before we start, let me preface this by saying that anchoring is one of the most dangerous tasks we regularly conduct. No, anchoring at a beautiful, calm anchorage is not dangerous. But we don’t practice things for beautiful, calm situations right? You can lose fingers, limbs, or even your life while deploying or retrieving your anchor. Although these situations are rare and thousands of people of various skill levels are anchoring at any given day, its something that deserves respect.
Scope is the ratio of the length of rode deployed to the vertical distance between where your rode exits the vessel and the sea bed. Simple! So if you’re in 6 feet of water, and you have 45 feet of rode out, and your anchor roller is three feet above the water, you have a 5:1 scope. One thing to keep in mind is you do need to choose your scope based on the projected high tide depth, not the current depth.
Since the boat is above the anchor, there will always be a vertical element on the forces that pull on your anchor. Unfortunately, anchors can’t work if they are being pulled up. And your anchor will have the most holding power if it is being pulled perfectly horizontally. This is why you need enough scope — you need enough of it to let your anchor be pulled horizontally, or at least as horizontal it needs to be.
Don’t listen to that guy who goes ‘I’ve been on X:1 scope and have been fine, and I’ve been boating for 30 years!’ Forget what other people tell you. Many boats have been lost because of bad or misplaced advice. Know these facts and live by them; you need a minimum of 5:1 scope at calm anchorages with good holding, if you have good ground tackle. You should mostly be at 7:1 to 8:1 scope, and if there is any possibility of bad weather, be out to 10:1 scope. The more the better, but you do start getting diminishing returns after 10:1. Ideally, you’ll let out as much scope as you can until you run out of space, taking into account other vessel’s swing radius as well as shoals and land. If you can’t do the scope you’ll need, then go find another place to anchor.
Remember, not only will the winds be pushing on your boat and yanking at your anchor, waves will throw your bow up and down, further jerking your anchor from different vertical directions. You will minimize this directional change if you have a lot of rode out. Vertical movement is bad. In fact, anchors are designed to come off the sea bed if there is vertical pull! Now that we’ve covered that, let’s talk step-by-step on how to deploy and set your anchor.
Most of us small boat owners hand weigh our anchors, so we will focus on manually deploying and retrieving your anchor, and skip discussions on windlasses, snubbers and bridles. (If you are curious on what any of these terms mean, please feel free to ask in the comments!) Procedures are different if you have a windlass, so please do your own research if you power your anchor up and down.
As you approach the anchorage, note what the wind is doing. If there is a substantial current, say, anything over 0.5 knots, take a note of that too. Look at your wind vane to see where the wind is coming from, taking into account your forward speed. To know what the tide is doing, use one of the many apps available nowadays, or look at a tide chart for the local area. You can also note your knot meter and your speed over ground (GPS or otherwise) and estimate tidal current speed and direction. You should be looking at your tide chart anyways because you will need to know how much depth you will have while you are anchored there.
About ten to fifteen minutes before I get to my anchorage, I will usually get the rode pulled out of the locker and flaked on the deck. So if I’ve decided on 150ft of rode, I’ll have somewhere around 156ft of rode flaked out on the deck as I need the extra 6 feet to do my cleat hitch and cover the distance between the hawspipe and the bow roller. Careful how you flake the line. Make sure it will not knot or bind up when it is being payed out.
Do a scouting run around the anchorage. Keep an eye on your depth sounder and try to make notes, mental or otherwise, on the shallow areas. Look for a good spot to anchor in. You’re looking for three things – protection from wind and waves, and distance from other vessels, and in case something happens and you start dragging, distance from shore. Get as far as possible from other boats. Its better for both vessels, but its also just good etiquette. If you want to socialize, you can always take your dinghy by your neighbor and shout ‘ahoy!’
You’re picking out a spot to drop your anchor, not where your boat will be. Remember, there are anchors in front of other boats, not right under where the boats are. In a crowded anchorage, its not a huge deal if you are floating near-ish their anchor, but you sure as heck don’t want to be fouling their anchor rode with yours. Don’t forget the boat downwind from you will eventually pick up anchor and leave.
After you’ve picked out your spot, head into the wind, or current, or a combination of both. Basically, you want to go directly up into the prevailing forces that pull you back. Most of the time this will be wind. But if you can’t tell, look at what other boats are doing, especially ones similar to yours. If there aren’t any differing currents from the spot you picked and where other boats are anchored, you’ll be pointing in the same direction. Approach slow– ‘bare steerageway.’
Slow down as you get to the spot where you want to deploy your anchor. Go a few feet past it, as this distance will be needed for your anchor to set. Stop the vessel at that location. Go forward, or have crew start deploying the anchor. Lower the anchor by hand-onver-hand, instead of doing an uncontrolled drop. If you have an anchor alarm on your phone, hit the anchor button now. The boat should be drifting back slowly at this point — if not, give it a bump into reverse to get it going. As the boat moves back, pay out the rode by hand. Lowering the anchor slowly and letting the rode out slowly is important, as you don’t want any chain or line falling on top of the anchor and fouling it.
Once your boat has moved back enough where there is no chance of the rode fouling the anchor (e.g. 6-8 feet), you can start backing down a bit more. While you are doing all of this, make sure the anchor rode is paying out nicely, not snagging on any deck hardware or chafing against anything. But more importantly, while all of this is going on, make sure no crewmembers feet, hands, fingers, and clothing and equipment are anywhere near anything that could get caught. Stand clear of any loaded or soon-to-be loaded rode and don’t be stepping on any part of the rode. Its no big deal if you lose the bow here. As the line gets taught, the boat will point itself right towards the anchor.
Once all of the line is out, add power in reverse. Watch landmarks and the water next to you to to keep track of your boats movement. A modern anchor like the Rocna will set quickly and suddenly, so make sure that your speed going backwards is not excessive. Once your boat stops moving, your anchor is set. Now add a bit more power in reverse to get an even better set, and hold that power for twenty seconds or more. If your boat doesn’t budge, you are properly set. Go forward and check to make sure there is no chance that the rode will chafe (On my sailboat, I have to add a section of garden hose to make sure my rode doesn’t chafe through a part of the bowsprit).
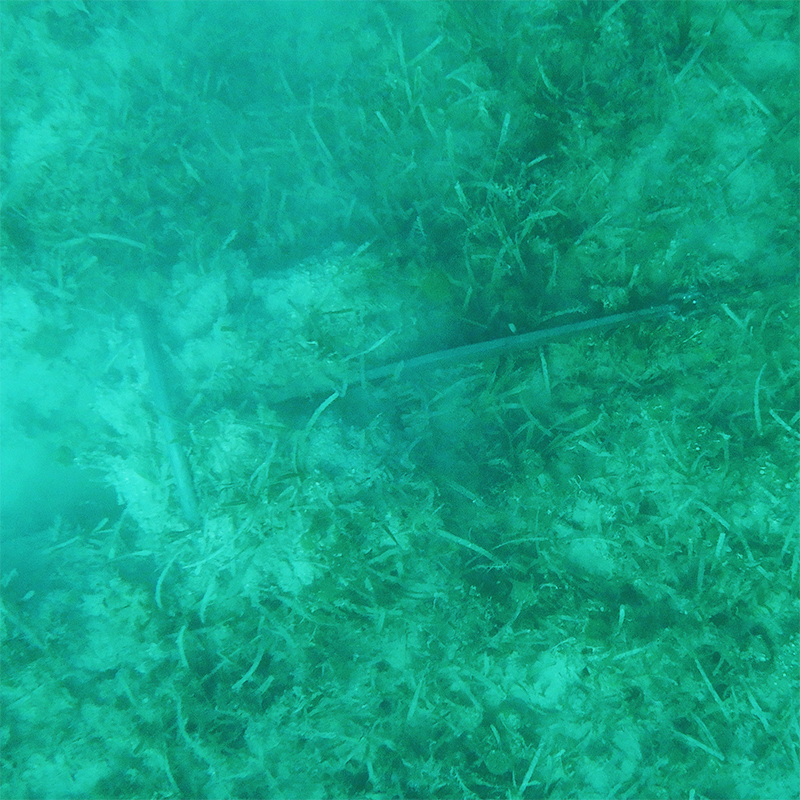
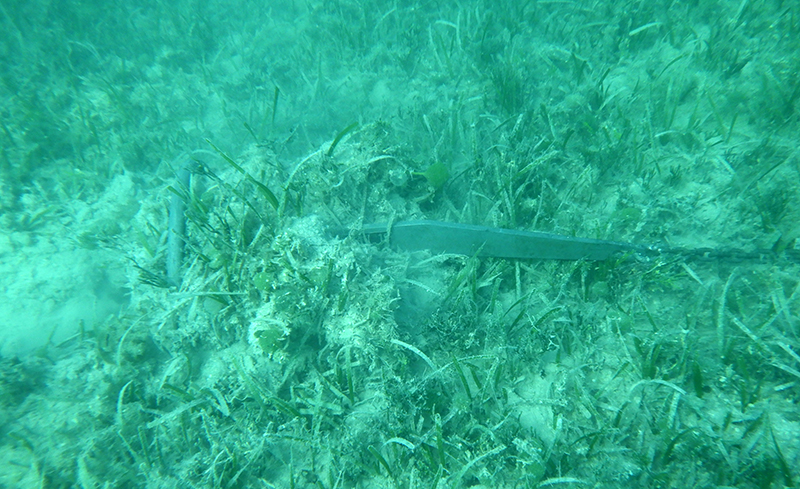
This is exactly what I did in Man-o-War cay. Except I dove the anchor a few times to visually confirm the set. I’d backed down under full throttle (my engine makes 20 horse power) for over a minute, until nothing but the tip of my anchor shank was showing above the sea bed. I had maybe 30 feet between the docks behind me and just enough room around the swing radius to clear the mooring balls. An anchor set this deep will most likely rotate while still buried under the sea bed when the boat swings around. Sure enough, the next morning, my anchor hadn’t budged. The sea bed was disturbed by the anchor turning in its own radius.
Here is how to retrieve the anchor. Sometimes you have to do this when your anchor won’t set — usually caused by a fouled anchor — but either way, the process is the same. Since we are hand-hauling, go forward and pull in the rode. If a lot of wind or current is making it impossible to pull in the rode, then power forward as you pull in the rode. If you’re single handing, then this might necessitate a few trips to the bow – power forward, pull in rode, cleat off, power forward again, repeat. When the anchor is under you with the rode vertical from the roller, then cleat off the rode and power over the anchor. The anchor will come off the sea bed. You are basically using the anchor’s weakness to pull out the anchor. Pull the chain and anchor up, secure the anchor (by the way, when you are underway, you shouldn’t just rely on the pin — make a few wraps around the anchor and the bowsprit with a line and tie it off), clean up the lines and head off!
The type of bottom you are on is important. This is a whole another subject, so I’ll briefly mention the best type of bottoms. Harder mud is great. Anchors penetrate it and the mud packs around it, providing excellent holding. Heavy sand is next. Grassy bottoms are okay, as long as you have the right gear and you really dig in the anchor. Soft sand is next, followed closely by soft mud. Any rocky or hard, rigid surfaces are the worst and you should avoid anchoring in these areas. You also should avoid any areas known to have cables or lots of debris. This being said, our environment is highly complex and can be varied from square foot to square foot. Sometimes a specific type of hard mud will be bad, and other times a type of light sand will be excellent.
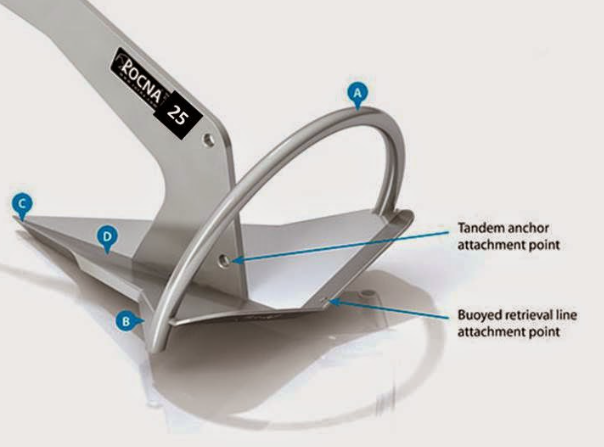
Sometimes despite your best efforts at avoiding bad weather, you’re going to be stuck out there. No other option but to deal with it. When anchoring will be your last option, you may need more than just your main anchor. So let’s talk about tandem anchoring, but take what I am about to say with a grain of salt. I, as any experienced sailor, am still learning and I’m only basing this on my experiences and the research I’ve done. But I believe tandem anchoring is the only way to gain additional substantial holding power from two anchors. This opinion is backed by a US Navy research on the subject. Tandem anchoring is a storm anchoring tactic, where your primary anchor is attached to a secondary anchor with a piece of chain. It has been shown to increase holding power by 30%.
You need an anchor that supports tandem anchoring, such as the Rocna anchor. That is, a dedicated hole for attaching a tandem anchor shackle. Not one for a trip line or something else. Secondly, you need a section of chain, or in a pinch, other type of line that has minimal stretch and a lot of breaking strength. This section of the line should be somewhere around 20-30 feet, because it needs to be longer than the depth of where you will be anchoring. The set procedures are the same, except that you lower the tandem (further from your boat) anchor first, then move back a little bit before deploying the primary. The goal here is to make sure there is slack between the primary and the tandem. This is important because you need to properly set the primary. It isn’t as important to set the secondary – that will happen as your primary starts dragging as it gets over-popwered. I’ve tandem anchored a few times, and I know many very experienced cruisers who swear by it.
That is a wrap! Armed with this knowledge and some practice, you should be able to anchor safely at most anchorages in the Potomac River and the Chesapeake bay. Please get your boat kitted out, and make a day out of practicing anchor sets and retrievals a few times! There is so much more to learn about ground tackle. So much more that I don’t know how to express the depth of knowledge and art that exists in this realm. So I highly recommend doing more reading – Captain Fatty Goodlander’s Creative Anchoring is an excellent book to read in a picturesque anchorage some day.
Captain Jerry Lee
Reflections DC boat cruises
One thought on “BOATING SAFELY – Anchoring (pt 3/3)”
Excellent advice!